

Introduction👨🏫
What is EasyOCR?
EasyOCR is a Python package that uses deep learning algorithms to perform Optical Character Recognition (OCR) on images. This package can extract text from images of documents, signs, labels, and more. It uses neural networks to recognize text and returns the recognized text as a string or list of strings.
In this project, we will be detecting the text from an image using EasyOCR and you’ll know what type of minor changes would get us better results and the errors I faced.
Outline💊
Here’s a step-by-step outline of the project:
Install & Import libraries
Read the Image & Create an Instance
Detect text in the image
Draw a bounding box on the detected text
Output
Minor changes that might affect text detection
Things to be checked
Why not Pytesseract
Install & Import Libraries📩
pip install opencv-python
pip install easyocr
Opencv is a Python library used to deal with images and videos.
EasyOCR will recognize text in images.
import cv2
import easyocr as eo
Read the Image & Create an Instance📖
# READ IMAGE
img = cv2.imread('railway_ticket.jpg')
Read images using imread() function.
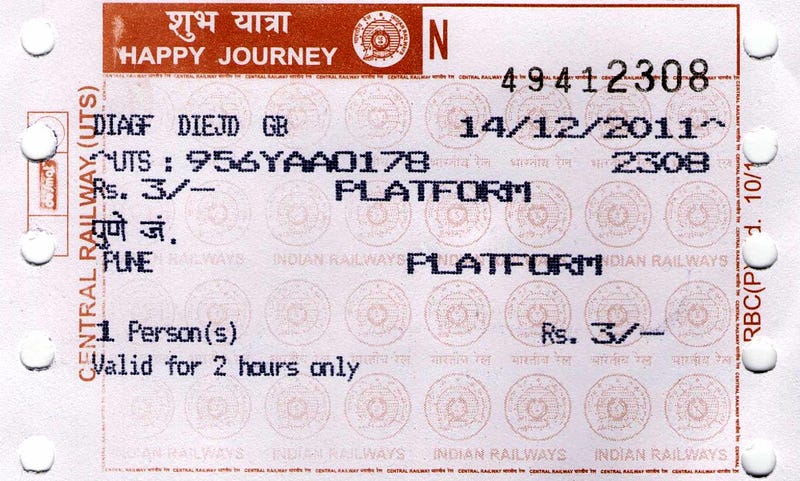
Input Image
# INSTANCE FOR TEXT DETECTOR
reader = eo.Reader(['en'], gpu=False)
Create a reader instance from EasyOCR for detection.
eo.Reader(['language'], gpu=True or False) , 1st parameter is for the language that you wanted to recognize and 2nd parameter is the access of gpu for faster results.
Detect text in the image🔍
text = reader.readtext(img)
— readtext function takes an image as a parameter and detects the text in that image.
Draw a bounding box on the detected text🖌
A bounding box means an abstract rectangle that acts as a reference point for object detection & produces a collision box for that object.

Bounding box drawn around object detected
for t in text:
    print(t)
    bbox, text, score = t
    l_bbox = bbox[0][0]
    l_bbox1 = bbox[0][1]
    r_bbox = bbox[2][0]
    r_bbox1 = bbox[2][1]

    cv2.rectangle(img, (int(l_bbox), int(l_bbox1)), (int(r_bbox), int(r_bbox1)), (0, 255, 0),2)
    cv2.putText(img, text, (int(l_bbox), int(l_bbox1)), cv2.FONT_HERSHEY_COMPLEX, 1, (255, 0 ,0), 2)
text variable that stores the output after detection. Where output consists of [bounding areas, text that detected, score(% of text detected is correct)].
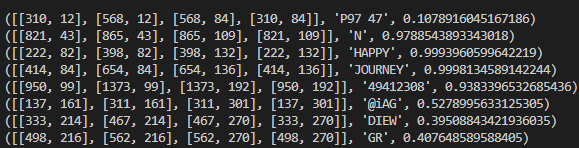
(Bounding area values, text detected, accuracy score)
So to draw a bounding box around the text that is detected in the image, we’ll pick the X & Y coordinates of top-left and right-bottom.
Now, using rectangle & putText function in OpenCV, we can draw the bounding box around the text as well as we can display the text detected on top of the bounding box itself.
Output📺
cv2.imshow("Output", img)
cv2.waitKey(0)
imshow method display processed output in a window.
waitKey() function takes a number as an argument. if ‘0’ is given, then the output window remains still, till we do not close it.
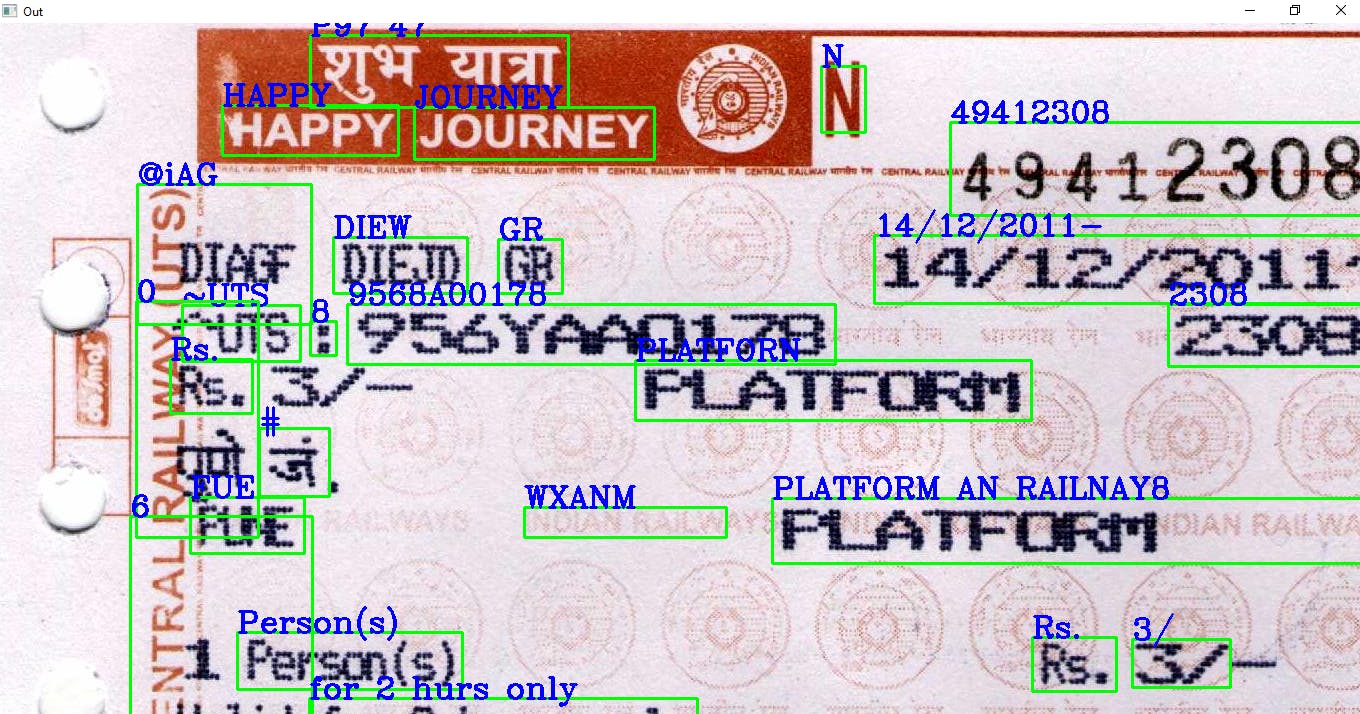
Output Image
Minor changes that might affect text detection
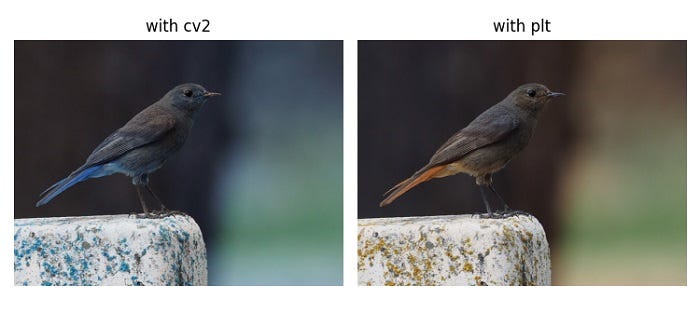
Generally, images can be read using Matplotlib or OpenCV. But the thing that I observed is when we read images using plt.imread() the text in some images(like having a black background, etc.) is not detected by EasyOCR, whereas in this case, cv2.imread() it can detect text in any type of background or other situations.
This happens because plt.imread() reads images in original pixels values as RGB channel, whereas cv2.imread() reads images in a way that pixels are clipped or scaled(enlarged) as a BGR channel.
Things to be checked📃
cv2.imshow() build error— if you’re using the latest version of OpenCV, then make sure you haveopencv-contrib-python.Do not perform downsampling of images irrespective of their dimensions. Suppose, you have an image of dimensions (600 x 400), do not make it (300 x 300)❌ this will degrade the results. Instead, do it in this way (600 x 400) → (300 x 200)✔.
If the color image is not working, then try converting the image into grayscale or binary threshold.
Make sure the text in the image is visible and the image is of good quality.
If the image is cross, then transform and rotate it.
Why not PyTesseract❓
PyTessearct is also the same as EasyOCR, but it is developed by the minds of Google.
EasyOCR is simple and supports various language detection.
EasyOCR is also more accurate while detecting complex text than tesseract.
EasyOCR is named because it is designed to be used “Easily”
Well, when it comes to speed tesseract is in the first place.
When I tried detecting text using tesseract on the black background it didn’t show any result at all.
Again, at end of the day, both of the tools are great and it all depends on the type of project we’re working on.
Conclusion🏃♂️
In this article, we have gone through how to detect the text in an image using EasyOCR and its total process step-by-step. And also discussed common errors that you might face while implementing this and a few tricks that make the model detect text more accurately. Also understood why EasyOCR and why not tesseract.
Full Code: GitHub🔗
Found any mistakes? or Can be improved better? Let's Connect
Let’s Connect*🔽*